Showing posts with label DIY. Show all posts

10.24.2014

Super Easy Apple Bread


Hello, world.  Did you go to the apple orchard yet this season?  Are you having a hard time coming up with yet another apple recipe?  Are you sick of apple crisp? I did, I was and I am.  So, I made some apple bread that is so easy a kid could do it.  And then I let my almost two year old practically do all of the work.  He had blast.  I even had a mini bread pan (shown in pic) so Eugene could have his own loaf.  This is one of those awesome dump all the dry ingredients into the wet ingredients, add the apples and almonds, stir and bake kind of recipes adapted from here.  In this recipe, I used all white flour, used applesauce instead of apple butter and used brown sugar-glazed almonds.  It is so soft and so, so good!  Enjoy!


10.06.2014

Bat and Owl Buddies: Printable Tracing Templates


Greetings friends! There is nothing too spooktacular (sorry!) about the owl and bat that Eugene and I created one rainy afternoon.  However, I like them because it is a good reminder of how simple materials such as paper, glue, scissors and sequins can come together to result in an awesome, fun project.  Not very crafty?  Not to worry, here are free printable bat and owl templates you can trace to make this project even easier.  Cut a bunch of these guys out and make Halloween garland to hang around your home.  Enjoy and have fun getting creative, friends!

9.24.2014

DIY Rolling Wood Stump End Table


A long time ago my husband and I spotted a large stump-round on someone's curb.  I begged Josh to haul this 70 pound beast into our trunk and he did because he is awesome.  We got busy removing the outer layers of bark with a crow bar.  When the bark was gone we sanded the stump until it was very smooth.  Then my dad and FIL dropped by and requested a project to do for us so we had them add casters to the bottom.  I recommend using 4 of the locking casters- they will add balance and stability to the table in case there are children around who could knock it over onto themselves.  Then it turned bitter cold in Wisconsin and we left the beast on our porch to dry out/winterize.  And then I had baby Elsa and forgot about said stump.  Fast forward to a gorgeous fall day (yesterday) when both kids napped for a very long time (4 hours).  I was finally able to paint and finish the stump.  Hooray!! I used painters tape to block off triangles of different widths.  I just eyeballed it and didn't measure, but if you're a perfectionist, by all means measure.  I used some fun paint colors to jazz up our front porch and then I sealed the table with some spray varnish.  I am so happy to have this project done in time for my favorite time of the year when front porch sitting is at its finest! Happy DIY-ing, friends!


9.22.2014

DIY Clay Pumpkin Patch


Most days lately, Eugene excitedly runs to the doors that open to the art/activity supply storage extravaganza and yells, "MAKE, MAKE!!" until I agree that it is indeed time for a creative activity.   He also happens to be obsessed with pumpkins currently.  Almost every day he insists that we make or draw something pumpkin-y.  Today we made these clay pumpkins.  Eugene helped by rolling the clay into pumpkin shapes and coloring a few of them orange with oil pastels.  Eugene helped me find a little stick from outside and then helped paint it white.  After the stick was dry, I simply broke it into a bunch of tiny pieces which became the stems for the pumpkins.  This is an easy, fun, fall activity to do with or without kids. Enjoy!


9.18.2014

Autumn Fun: Leaf Art Project for Kids and Adults


It's that time of year again...YAHOOOO! The leaves are turning colors and are beginning to fall from the trees.  Why not grab a few of them next time you are outside for this fun sensory project?  You can go also on a nature hike to gather leaves/weeds which is what we did.  Leaf art can not be any easier to do with your wee ones.  Eugene dipped the leaves in paint and went crazy.  We leaf-stamped, used the weeds as a paint brush and got messy with the paint.  The point of this project is to use different textures to create a design and introduce your child to using nature as a tool.  The end results are always awesome.  I ended up framing Eugene's work and he is so proud of himself! Enjoy 


9.16.2014

3-D Hanging Bird Project for Children


Hi friends! I have another fun and simple project that you can do with your kids. These will be sure to brighten your child's day and your house.  Enjoy!


To assemble birds start by cutting out various bird shapes using any cardboard type of material (we used a cereal box).  Paint both sides a fun color and let birds dry.  Poke a small hole in the middle of the bird and insert feathers on each side. We added sequins for the eyes and then hung them using lace and washi tape.  Eugene is loving pointing to them and saying "birdie".  Another fun project would be to make a bunch of trees that could house your birds.  The possibilities are endless!

9.11.2014

Paper Bag Owl Craft Project for Children


This is a pretty self-explanatory activity to do with your littles.  It turned out really cute and was easy enough that Eugene, who is 22 months old, was able to help.  I started by tearing two holes where the eyes would go and tearing the wings out from some scrap paper.  Eugene and I used a glue stick to attach the wings.  I let him go crazy with the pink paint (acrylic...gasp! It's not washable but we were careful, sort of).  I let Eugene scribble all over the owl and I added the details using a black Sharpie.  Any number of materials can be used, including kid-friendly ones.  You could get über creative and add sparkle, sequins, feathers etc...

5.14.2014

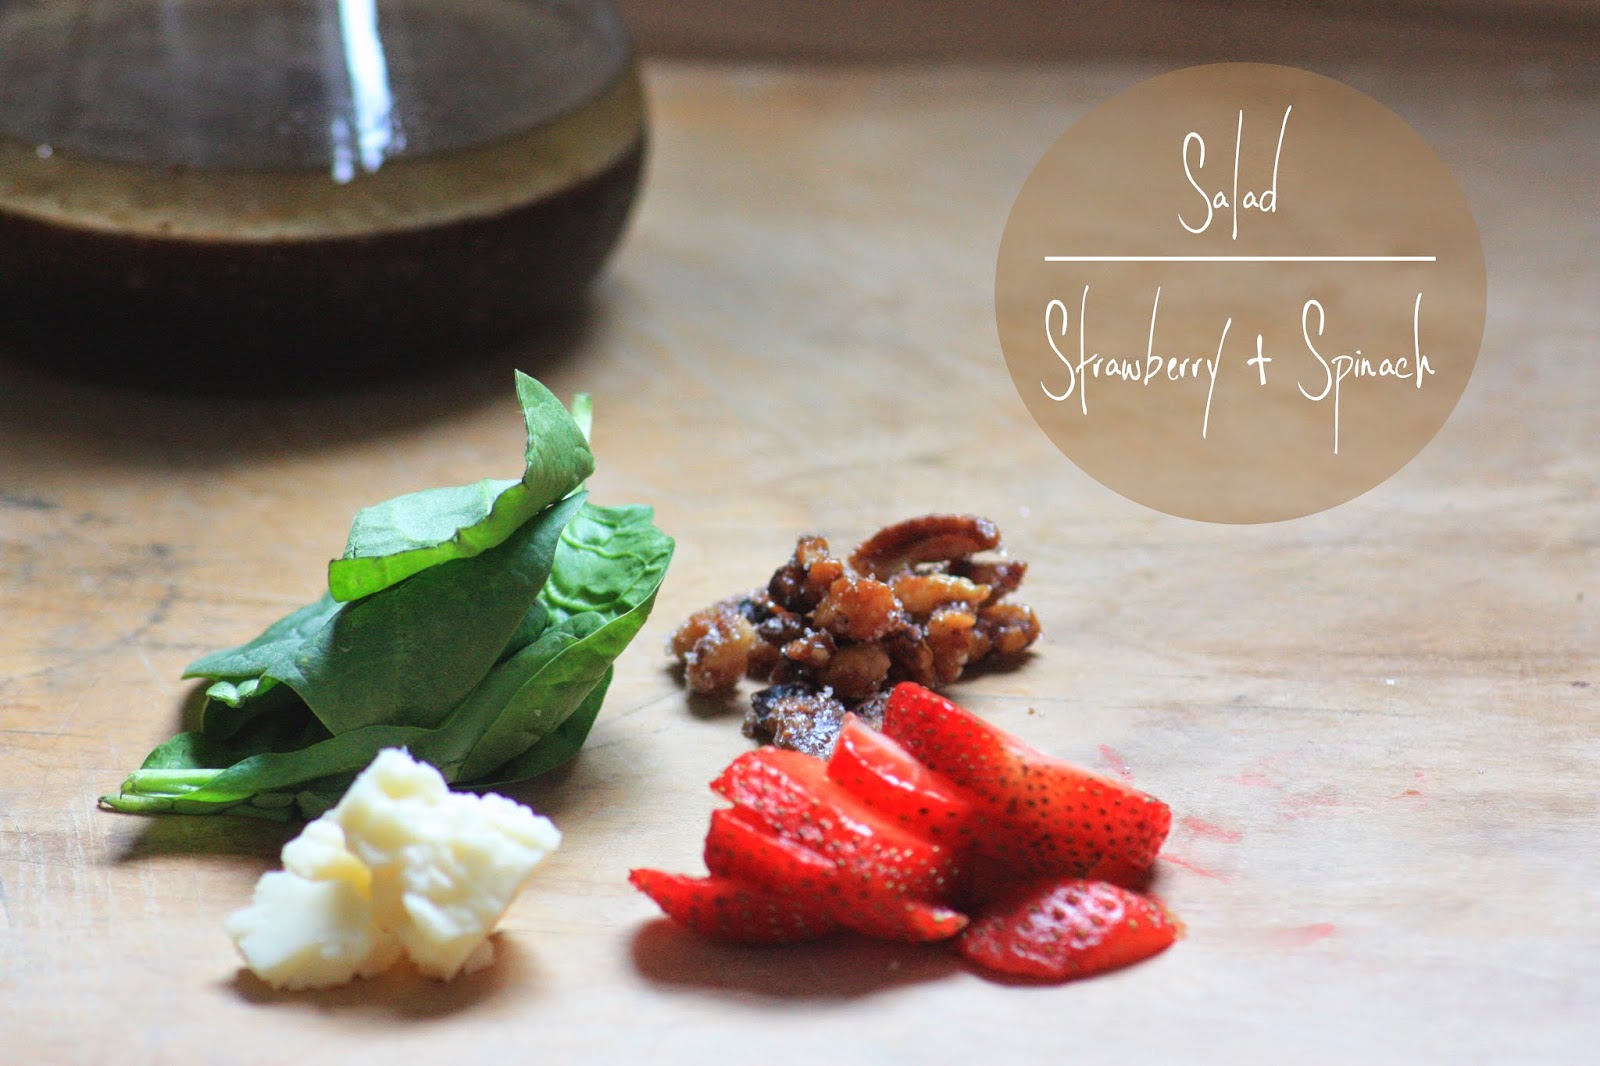
Salad | Strawberry + Spinach


Spring is here and that means the farmer's markets are just about in full swing!  Here is a tasty salad to make with some fresh farmer's market finds.  Pick up your favorite Balsamic Vinaigrette dressing (or make your own/use any vinaigrette dressing) and toss it with the following ingredients: 


To make candied walnuts (or pecans) melt 1 Tablespoon of butter in a frying pan and add 2 tablespoons brown sugar to pan.  Add walnuts after the sugar is dissolved and fry for a few minutes, careful not to burn the sugar.  Cool on wax paper until set.  Toss in sugar to coat.  Let harden for at least ten minutes/try not to eat them all.  Enjoy and happy hunting!

5.02.2014

Mother's Day Brunch

Mother's Day is quickly approaching so why not show mom some love by throwing her a Mother's Day brunch!  I have put together some ideas to make a pretty, easy and affordable brunch for mom. Enjoy! 


4.30.2014

Fruity Italian Cream Sodas


I was in the mood for something exotic (ha, ha) and fruity.  This Italian cream soda made with a fresh mixed fruit syrup was just the ticket! It is so easy to make.  I suggest making these for a party and wowing your guests. You could make the syrup days ahead of time, just be sure to pop it in your fridge.  If you have a wedding coming up, this would be a fantastic mocktaill.  Or add booze and sip on the ultimate wedding cocktail that is gorgeous and fresh!  


10.01.2013

Having A Blast

As you may know, we are expecting our 2nd child in March! We couldn't be more excited to grow our little family + for Eugene to have a playmate.  We won't find out the gender for another month so in the meantime I came up with some gender-neutral ideas for the nursery.  Just me over here dreaming + being inspired.  Enjoy!


7.05.2013

DIY Ombré Woven Flower Pot

 Good morning, all!  I hope you had an enjoyable, warm, festive 4th of July. We headed to Lake Michigan as soon as Josh got done with work to watch the waves & let Eugene play in the sand.  We had a quiet night of grilling out, baths & watching Justified. Today I am sharing a very easy, inexpensive DIY with you:
 
A colorful ombré flower pot for less than $10. 
 
Supplies:
 
-Woven basket (mine was $2.00 at a thrift store)
-White & blue acrylic paint (or any color you like)
-Paint brush
-Potted plant
 
1. Start by cleaning the basket to rid it of dust/dirt. 
2. Then apply 2 coats of white paint, letting the first coat dry completely.  I used Martha Stewart Acrylic Satin paint which cost about $2.00 per bottle.  I got the paint at Michaels, but most craft stores carry it.  I have found this paint to work the best & last the longest.  
3. While the last coat of white is drying, start painting the bottom of the pot with the colored paint. 
4. Next, start working your way up the bottom half of the pot with the colored paint. Add more pigment at the base of the bottom & less as you go toward the top to create the ombré effect. I used a dark blue color which you can see turned a nice light blue as the white & blue blended.  You can get as creative as you want.  You can also simple paint the woven pot one color.  I like how the paint brings out the detail of the weaving.
5. Put up in your place & enjoy! Or give it away as a housewarming gift!


6.10.2013

Customizable Teepee Art For Your Nursery

 
Hello!  This is a whimsical teepee print that I made for my son Eugene's nursery.  I thought you might also like to have this artwork for your baby's nursery or to give away as a fun baby shower gift.  You can visit my Etsy shop to have the teepee customized to any name. 


It was so fun to make & I feel inspired to make more art for Eugene's room.  I hope the sun is shining brightly in your corner of the world.
 
Xoxo,
Heather

5.03.2013

Our DIY Wood Headboard

 
I want to share with you a very simple, DIY headboard project that my husband & I did together to celebrate the warm weather & sunshine. 
 
 
We started by gathering a total of 6 pieces of wood from Home Depot.  We used 5 longer boards for the actual visible part of the headboard that each measured 8' x 1&3/4".  Our bed is a king & measures 76" in length.  We realized that the headboard would be about 10" longer than the bed on each side, but wanted this grand, over-scaled look.  The hope is to one day put lighting or hang plants on each side of the bed, utilizing the extra length & space of the headboard.  We also purchased a 108" thicker piece of wood that we cut in half to use as the support/legs of the headboard.
 
Next we cleaned & stained all the wood using a Polyurethane stain in Espresso.  We gave the wood 2 coats of stain & 2 coats of a clear Polyurethane finish, letting each coat dry for at least 2 hours in a well ventilated area (outside).  With the finished sides facing down we put the 5 boards together vertically on a clean surface & measured in 24" from both ends.  We then positioned the legs horizontally on the back of the headboard at the 24" mark.  Each leg, which acted as a brace, got 5 long wood screws screwed in directly over the center of each of the vertical boards. That was it.  We let the piece dry outside overnight & then excitedly put it behind our bed. The final look is rustic chic & we love it.  I painted a whimsical field of flowers on a large canvas & hung that above the bed.  
 
 
To complete the look I threw a variety of fun, colorful pillows on the bed. 


Everyone in the McDonald house seems to be enjoying the new space!  It was such a fun, simple project which has inspired us to try making a coffee table next.  Stay tuned...
 
Xoxo,
Heather


5.02.2012

Our DIY Wedding


ALL PHOTOS BY PAPER ANTLER


DIY White and Yellow Pom-Pom Garland:
Supplies: White string, hot glue gun & glue, favorite colored poms.
Take white sting and attach the poms evenly with hot glue, alternating colors.  Hang & enjoy!

DIY Paper Circle Garland:
Supplies: Fun paper (magazines, old novels, scrapbook paper, wrapping paper), string, hole-puncher.
Make circles out of paper; punch 2 holes on tops, string circles evenly.  Hang & enjoy!

DIY Invitations:
Supplies: Card stock, bird punch, edge punch, silver thread, computer, RSVP template, glue stick.
Print invitation information on cardstock for RSVP cards and wedding invites.  Punch edges to give them a classy, professional look (I used Martha Steward brand for edges and the birds). Punch out 2 birds on invites.  Wrap thread around top of invites.  Add a fun scrapbook paper under part of the birds using a glue stick.  I made postal stamps using my artwork (bird-themed) at Zazzle.com, easy & affordable.


DIY Happy Tears Table:
Supplies: Old table, old picture frame, paper, hankies, sweet little bin, spray paint.
Find an old table, sand it down and spray paint it a color you like (I used robin’s egg blue).  Make a sign that says, “Happy Tears, Please Take One” and frame it.  Arranged old and new hankies in a bin you enjoy and place on table for guests to use during the ceremony.

DIY Bridesmaid Flowers & Groomsmen Boutonnières:
Supplies: Sturdy sticks, white spray paint, tissue paper, hot glue, string, yarn.
Spray paint sticks white & allow to dry. Take 4 various sized & colored tissue paper squares; (I used teal and light aqua) bunch & twist to form a flower & glue in place.  Take yarn (I used goldenrod) and separate until fuzzy wool is left.  Take a bit of wool and glue in center of flower. Glue flowers to branches.  Assemble branches into a bunch and tie with twine or string. To make for groomsmen repeat only on a much smaller scale.  Attach to suits using a decorative push pin.

DIY Bouquet:
Supplies:  Fresh flowers, flexible wire, satin ribbon, antique broach, decorative push pins.
Arrange fresh flowers (I used all white flowers) and secure with wire.  Hide wire by wrapping the stems with satin ribbon (I used a teal ribbon).  Pin on antique broach in center & push pins at top/bottom.

DIY Treats Table:
Supplies:  Old-fashioned or favorite candy & treats, vintage bowls, decorative take-away bags, cloth.
Collect candy & treats (I made white/dark chocolate covered apples) & arrange it neatly in fun, vintage decorative dishes.  Cover table with a vibrant cloth. Have guests take away candy using fun bags. If you desire, make a fun sign to hang above table (mine said, ‘sweets’ & I used leftover paper & glue).

DIY Whimsical Signs:
Supplies: Old wood (both flat & in stick form), paint, wood glue.
Paint a white background almost to edges on flat wood.  When dry, add letters (J + H) or words (Wedding with an arrow or Just Married or Mr. & Mrs.) using a bright color (I used teal).  Glue stick to sign with wood glue & allow it to dry. Dig hole & secure in ground or nail signs to trees.

ALL PHOTOS BY PAPER ANTLER


12.07.2011

Owl & Howl


I came across an adorable free printable 2012 owl calendar that you can make for your home or office or as an adorable Christmas gift.  It is from My Owl Barn & there is absolutely no catch.  You get to design your own mini-calendar that's sure to be a hit.  The best part, it's easy as 1, 2, 3!  Hoo knew?

Step 1:  Click here.
Step 2:  Choose 12 whimsical designs, 1 for each month, & download.
Step 3:  Print & assemble. . .then enjoy!


My Owl Barn's pre-selected calendar